Settings
Settings is the menu for managing POS configuration, such as cashier identity, receipt or invoice printer settings, scan settings, as well as access to help and shortcut lists.
Purpose of Settings
The Settings menu is used to:
- Configure cashier parameters (store, warehouse, cash register, and MAC address).
- Configure printer for printing needs (store and online).
- Configure scan options for more consistent item input.
- View help and available shortcut lists in POS.
- Manage device binding via the Unbind Mac feature (if available and permitted).
Accessing the Menu
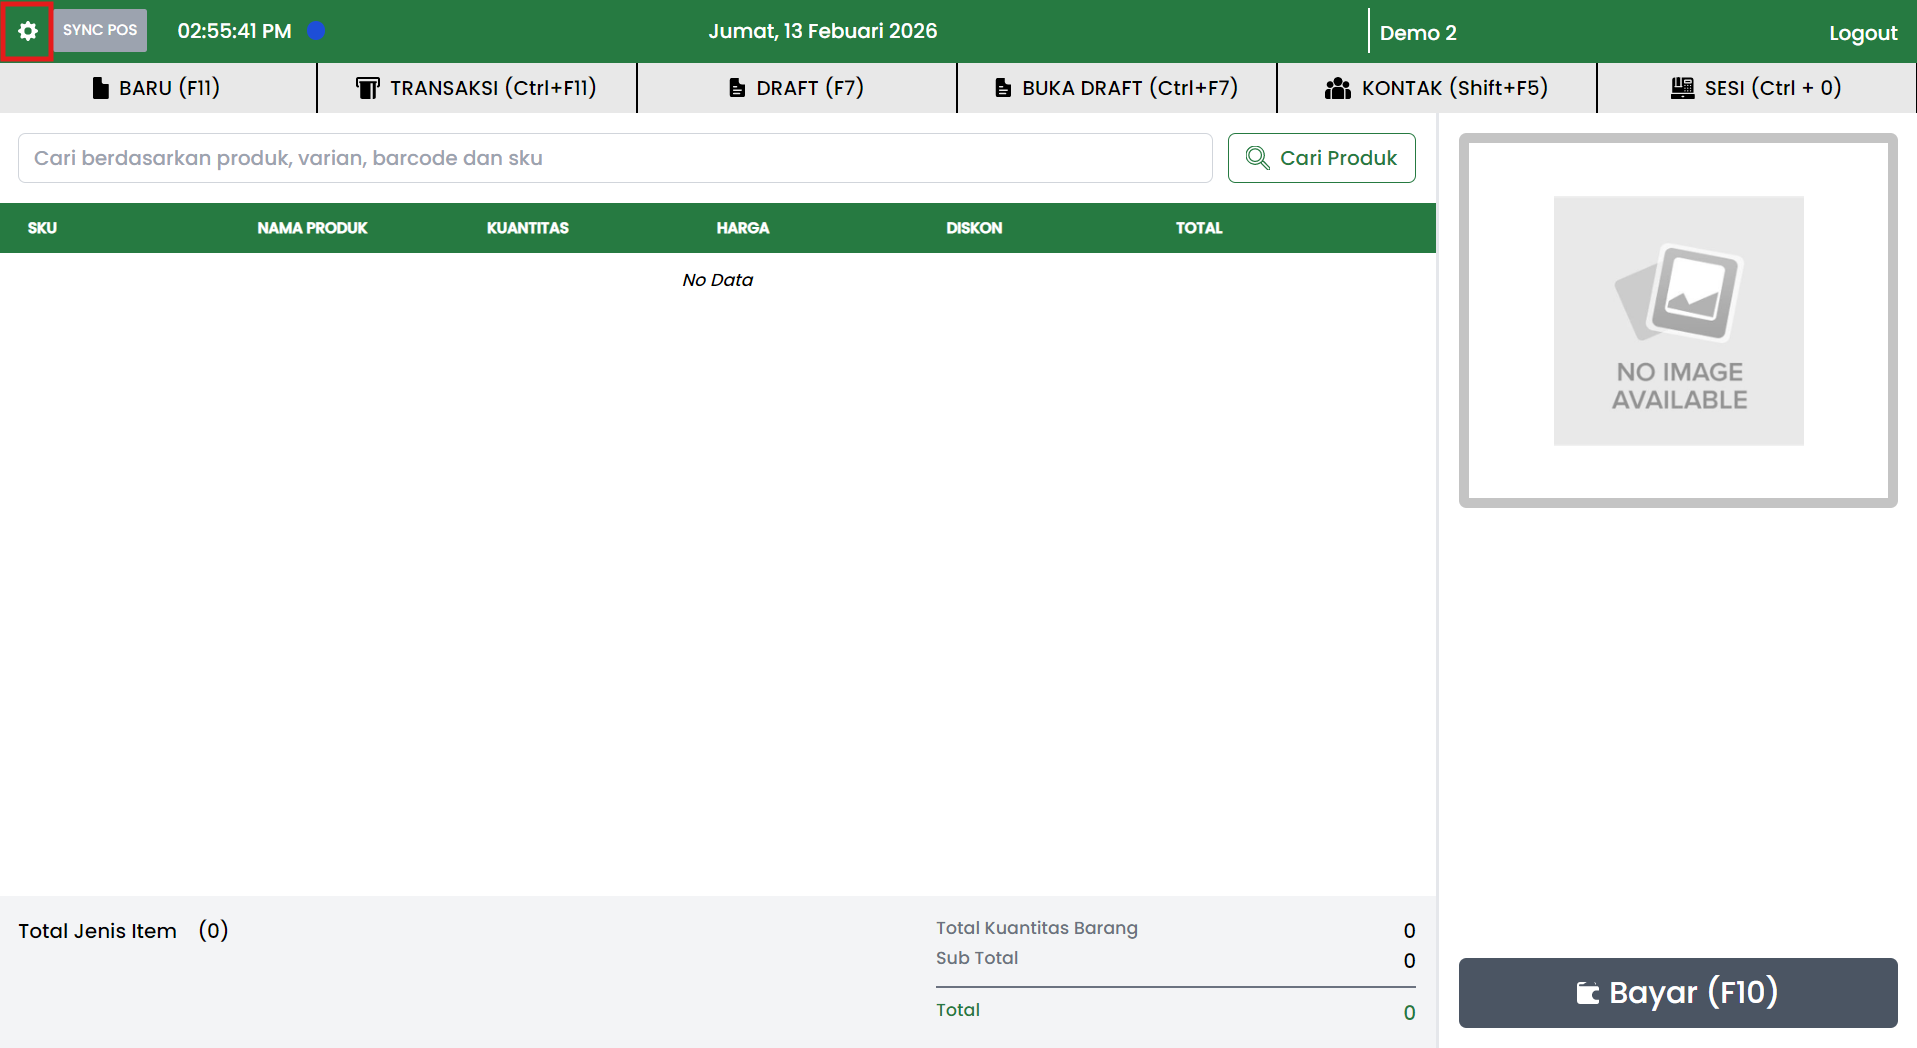
- On the POS page, click the Setting icon (⚙️) at the top left.
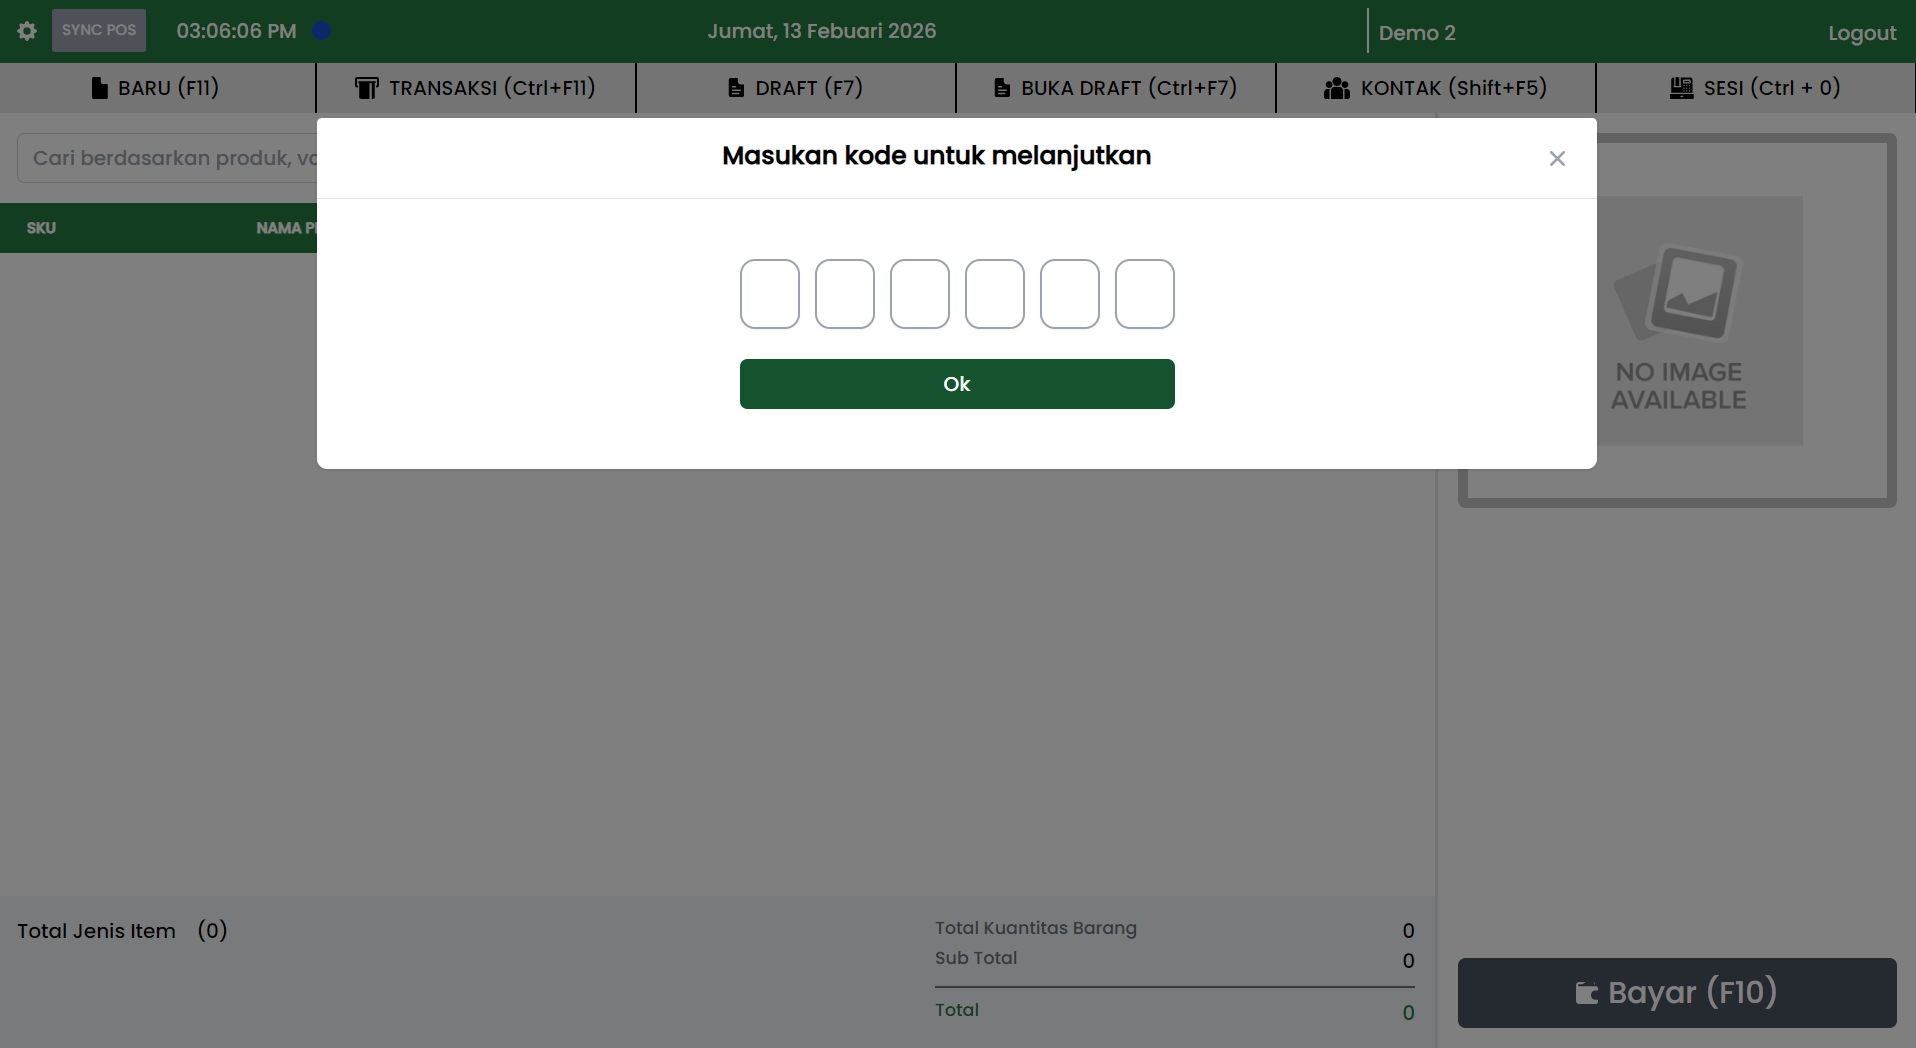
- The system displays an authorization popup: "Enter code to continue".
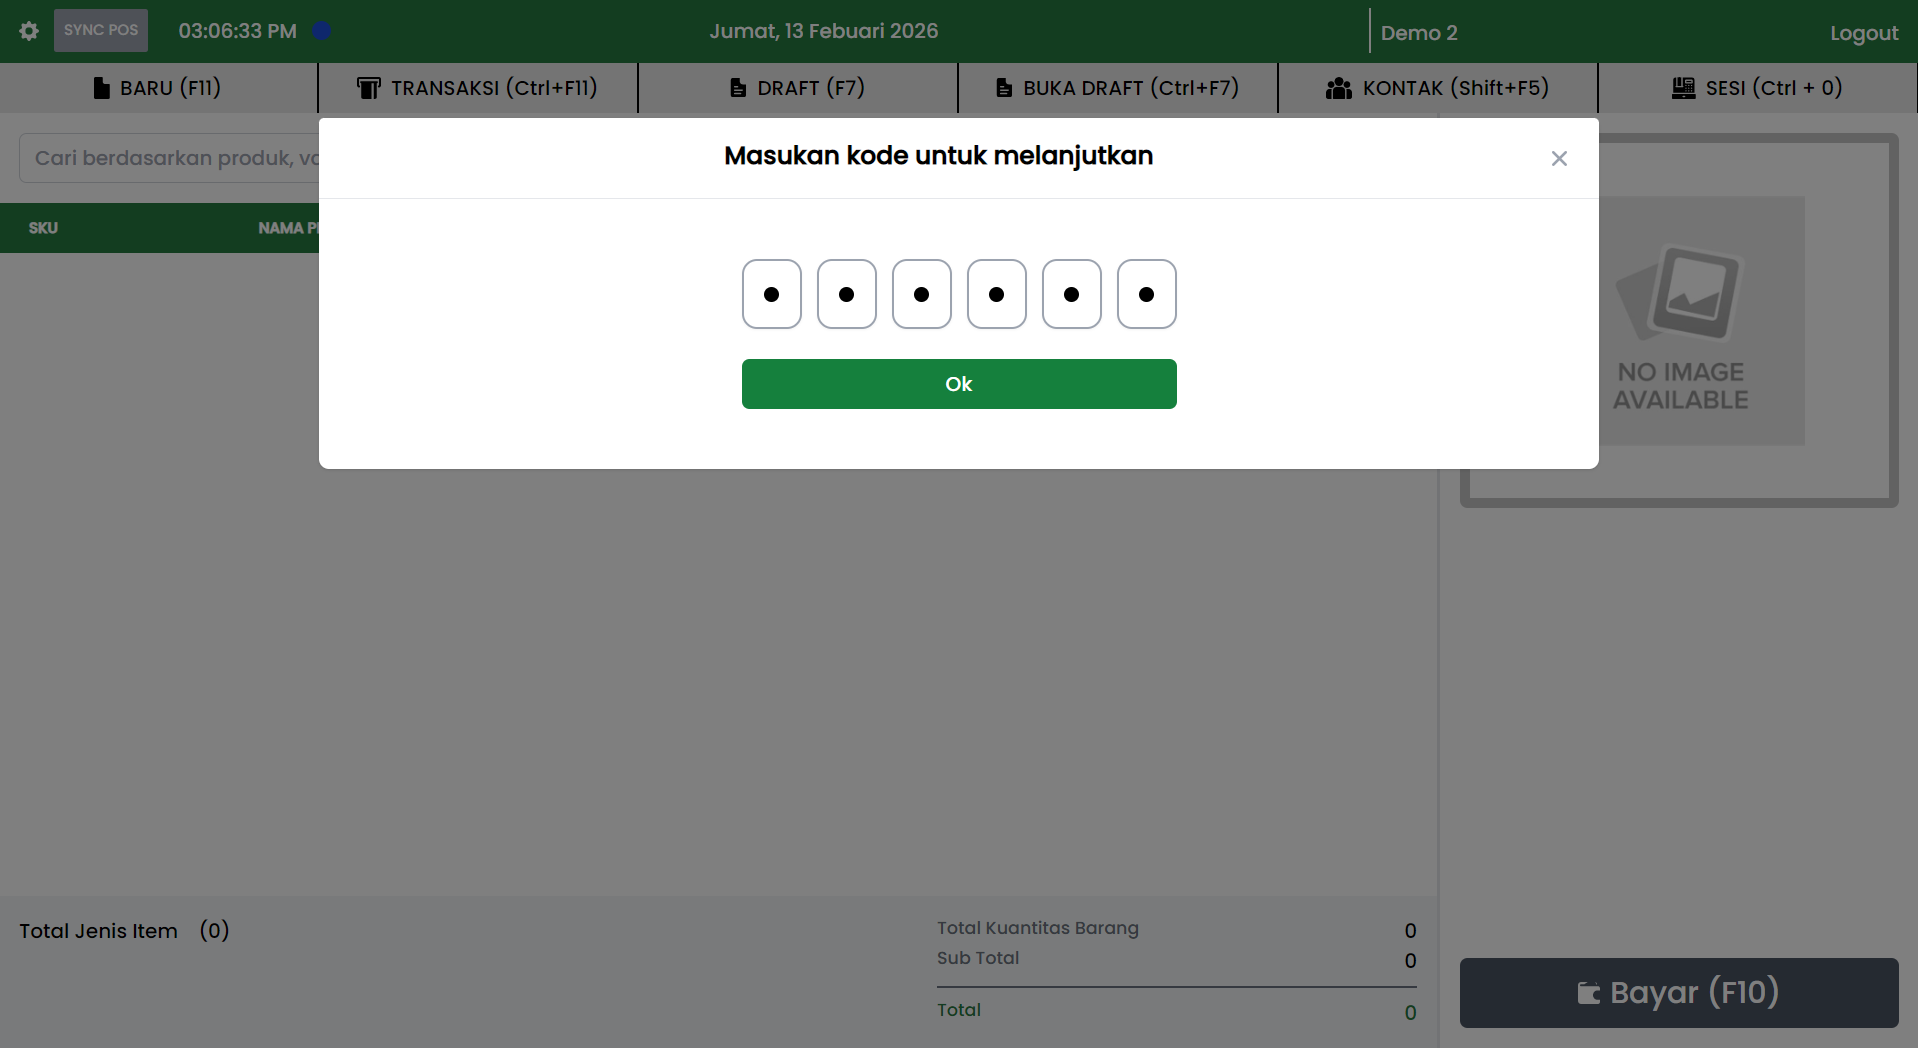
- Enter the POS Approval Code, then click Ok.
- If the code is valid, the Settings popup will open.
Settings Menu Structure
In the left panel, the following menus are available:
- Cashier Settings
- Printer Settings
- Scan Settings
- Help
Each menu will display its configuration in the right panel.
Cashier Settings
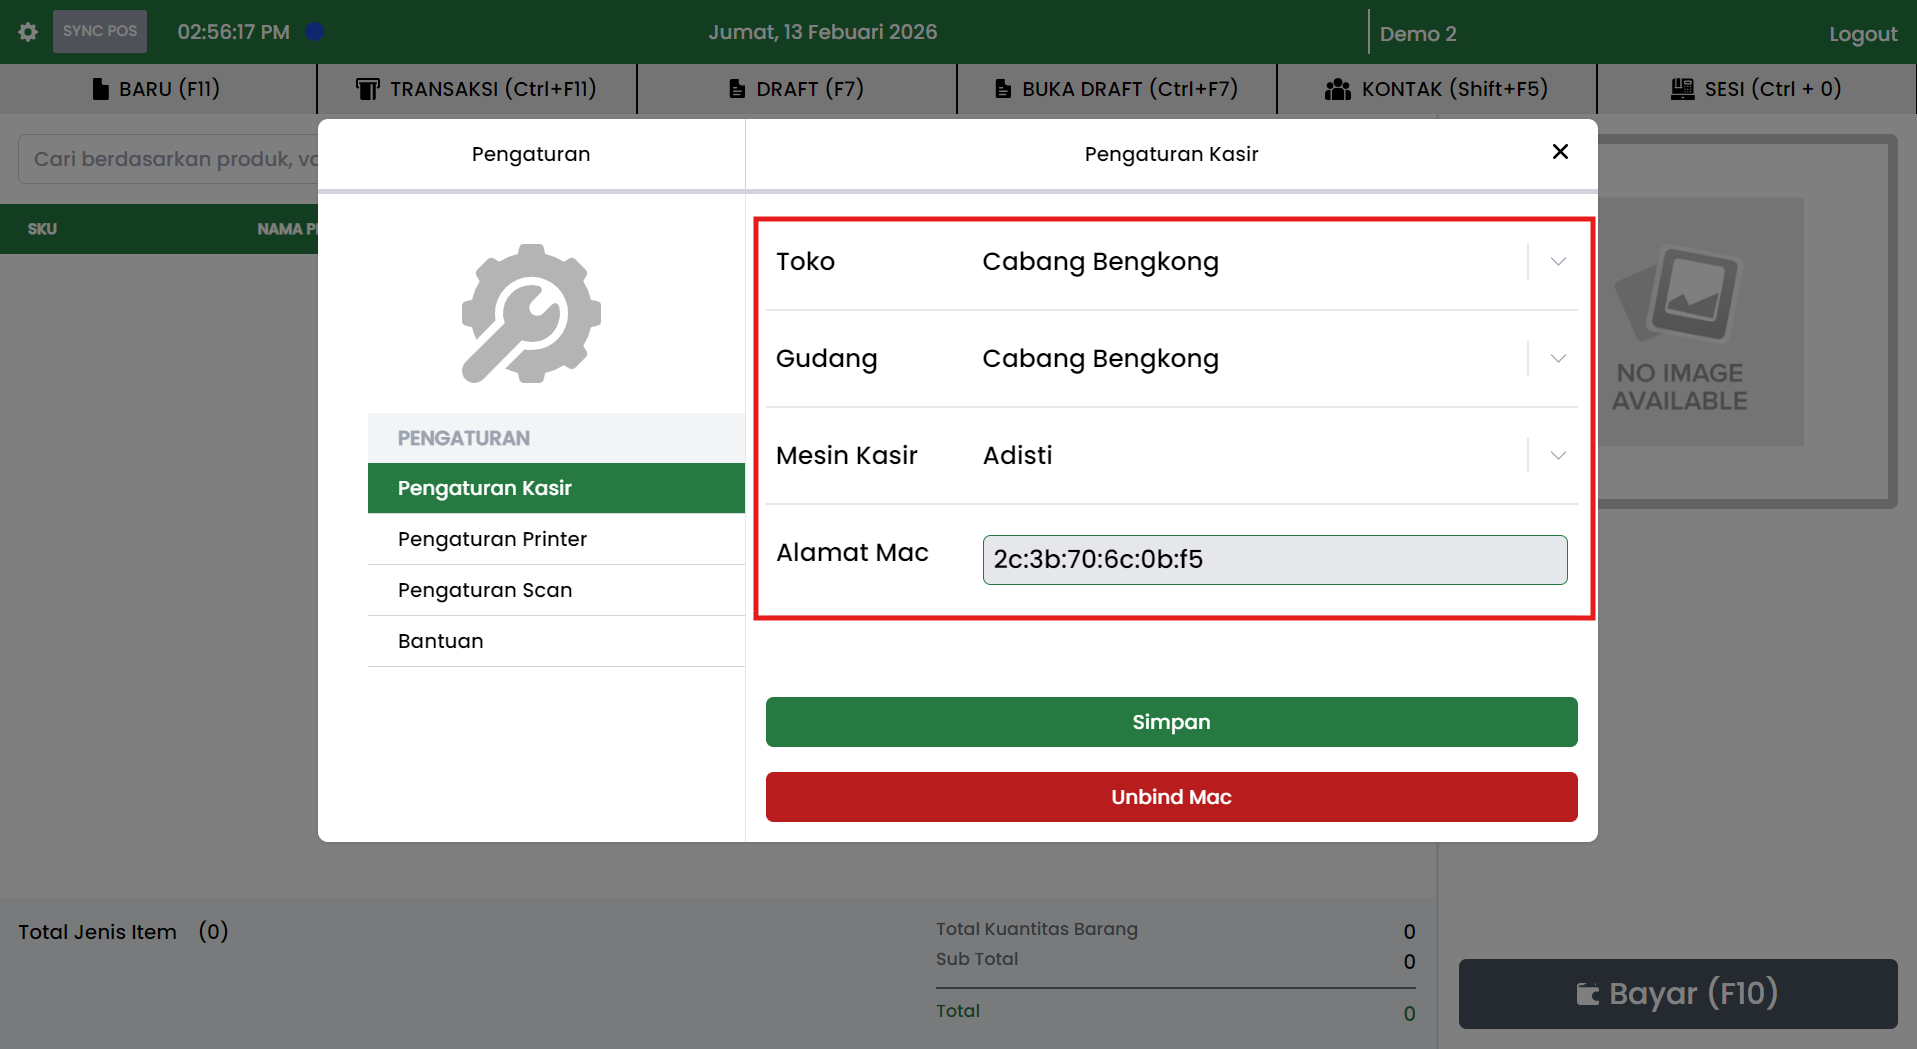
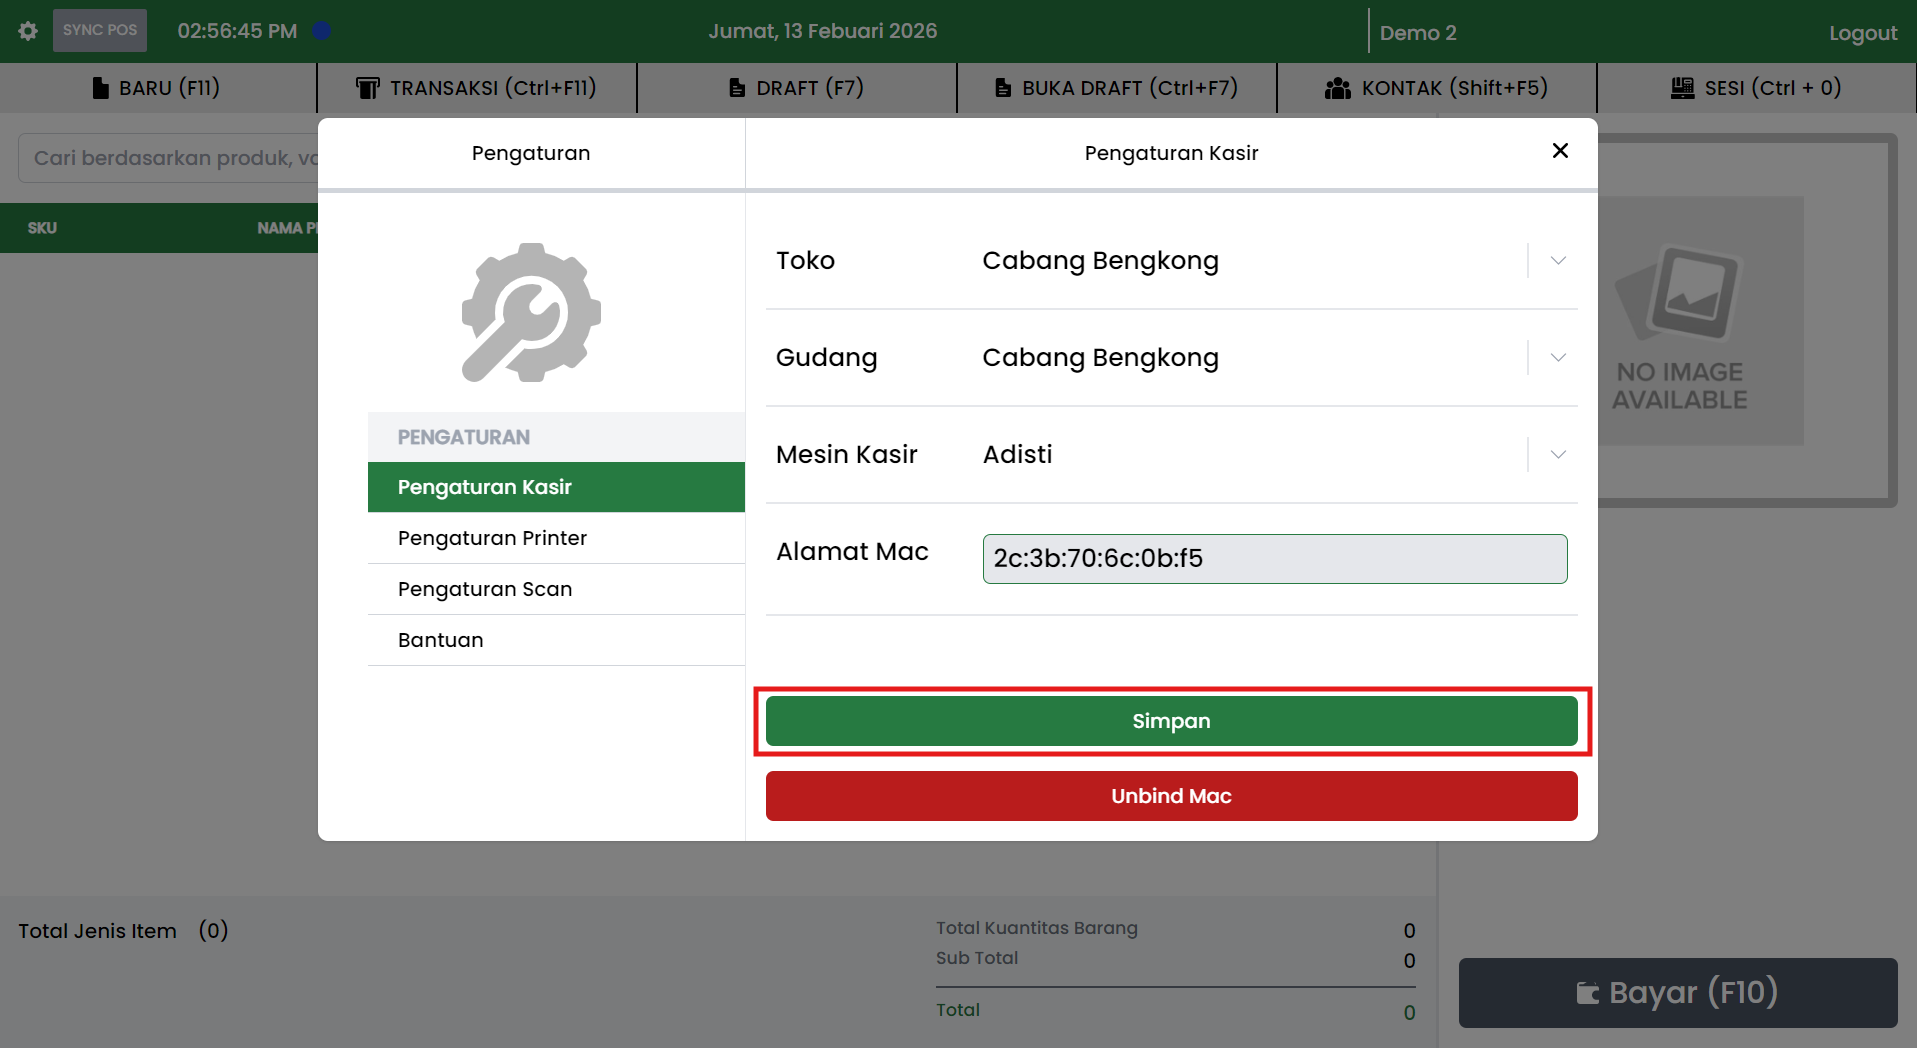
This menu contains the identity of the POS being used.
Data commonly displayed:
- Store (dropdown)
- Warehouse (dropdown)
- Cash Register (dropdown)
- MAC Address (input)
Save Changes
- Make sure the Store, Warehouse, and Cash Register selections are correct.
- Make sure the MAC Address is filled in (if required).
- Click the Save button.
Unbind Mac
The Unbind Mac button is used to release the POS device binding to a specific MAC address.
Common usage scenarios:
- Device moves to a different location or changes machines.
- Device needs to be re-registered due to configuration changes.
- Internal policy requires a binding reset.
General steps:
- Open Cashier Settings.
- Click Unbind Mac.
- Follow the system confirmation (if any).
- After unbind is successful, reconfigure and click Save.
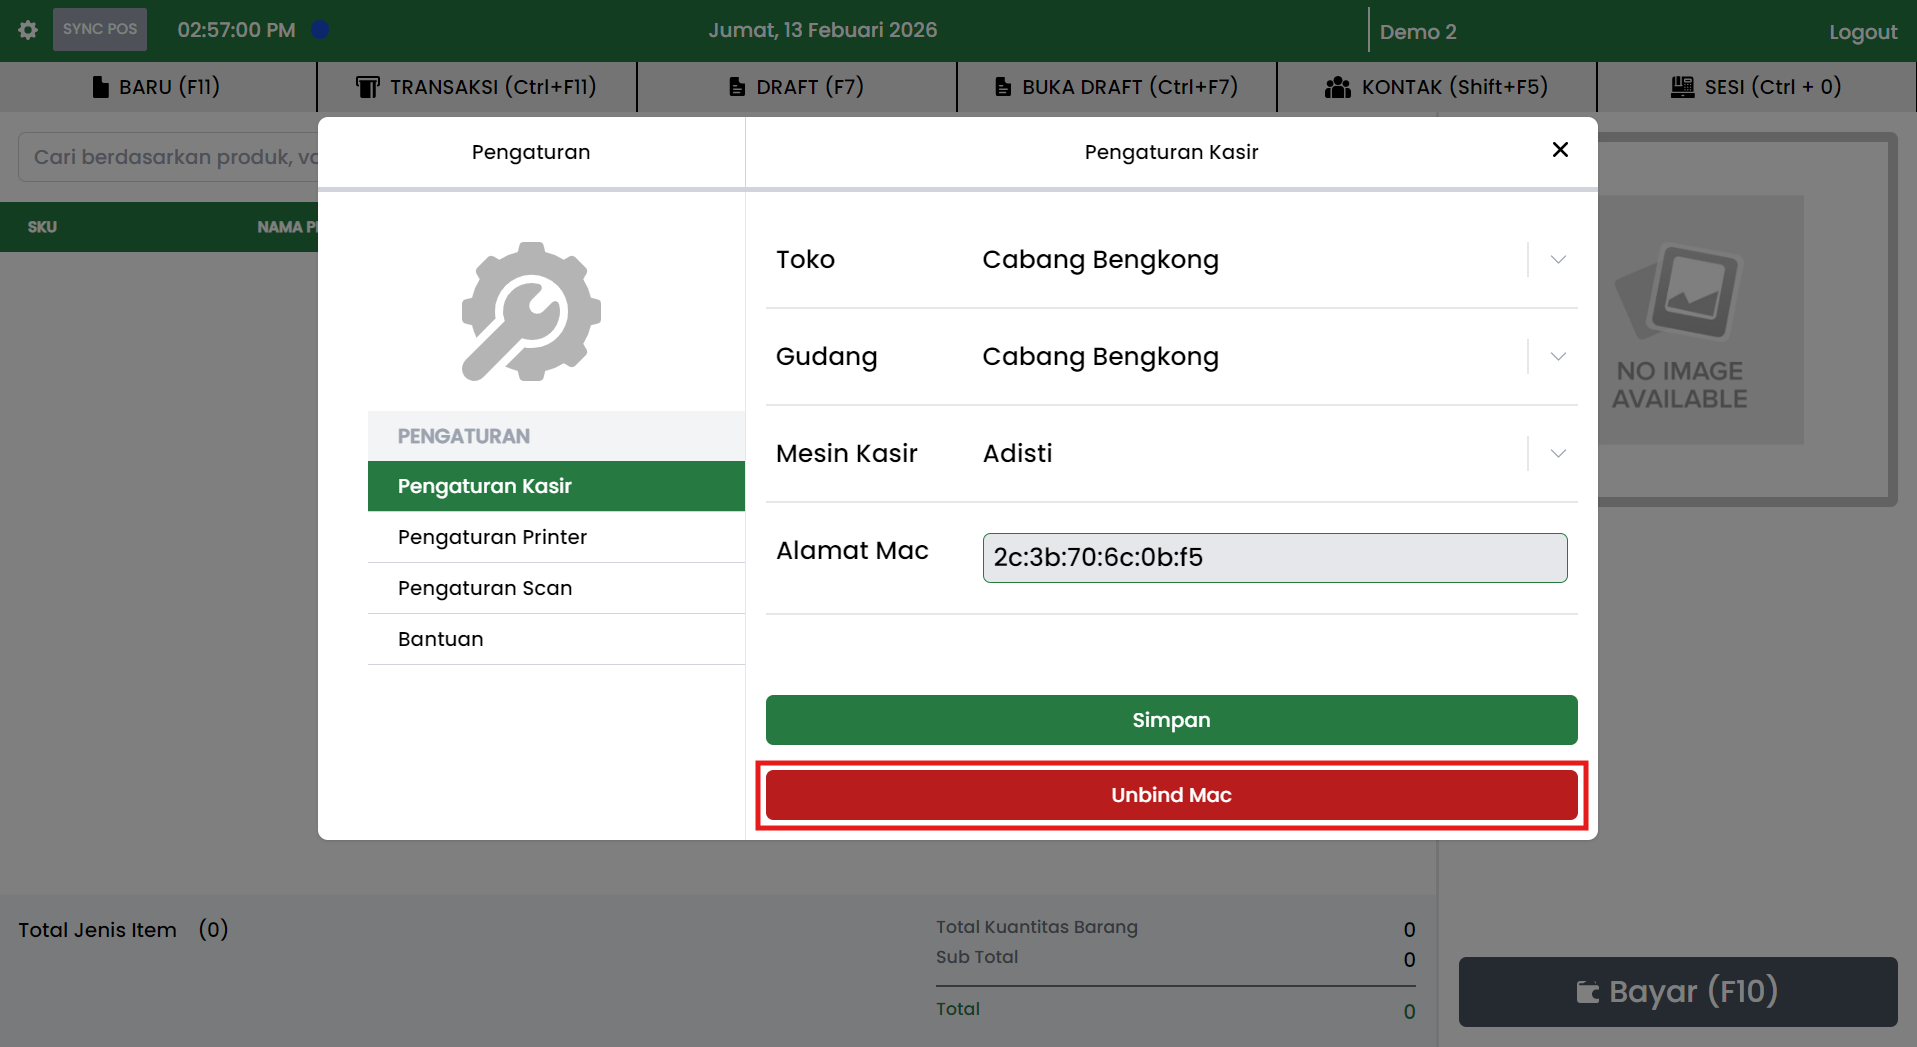
Note: the Unbind Mac button is usually restricted by access rights or admin policy.
Printer Settings
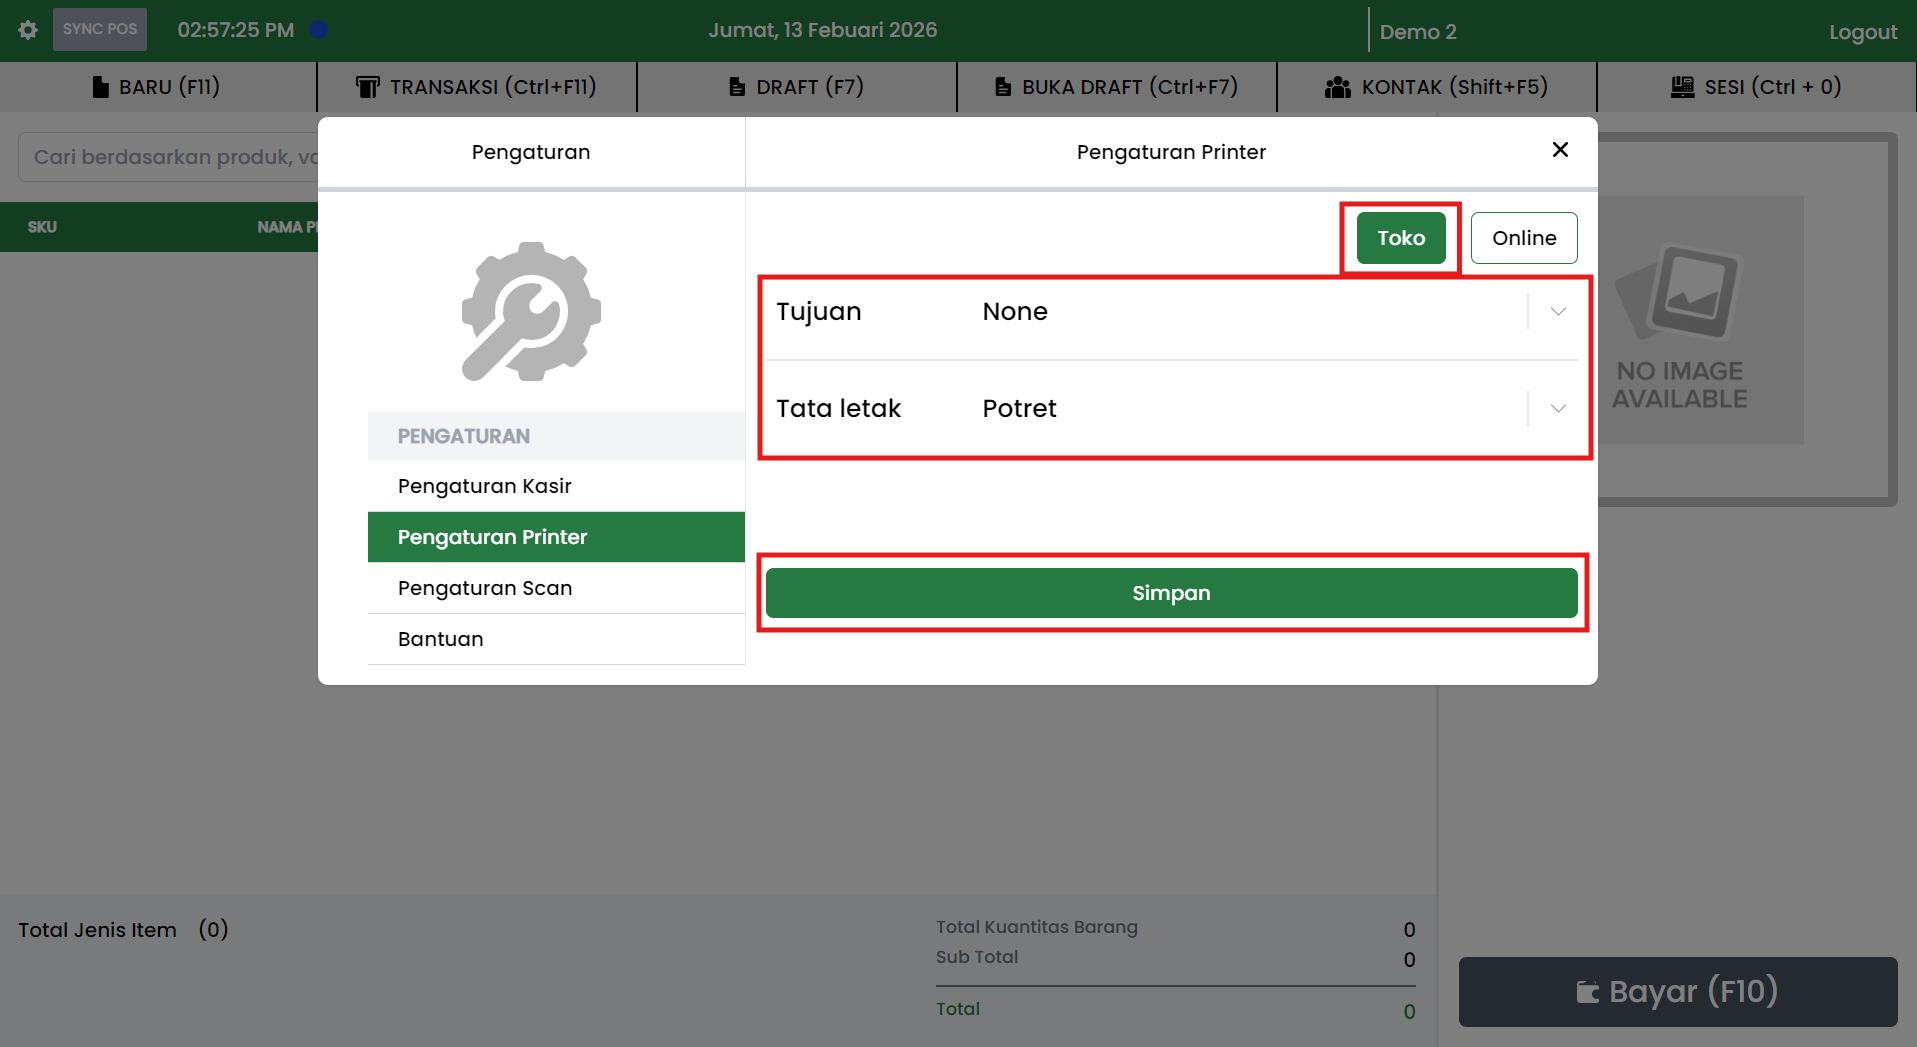
This menu configures printing needs for transactions.
Main components:
- Printer mode:
- Store
- Online
- Parameters to configure:
- Destination (dropdown)
- Layout (dropdown)
- Action button: Save
Configuring Printer for Store Mode
- Open Printer Settings.
- Make sure the Store tab is active.
- Select the Destination according to the printer used.
- Select the Layout according to the desired print format.
- Click Save.
Configuring Printer for Online Mode
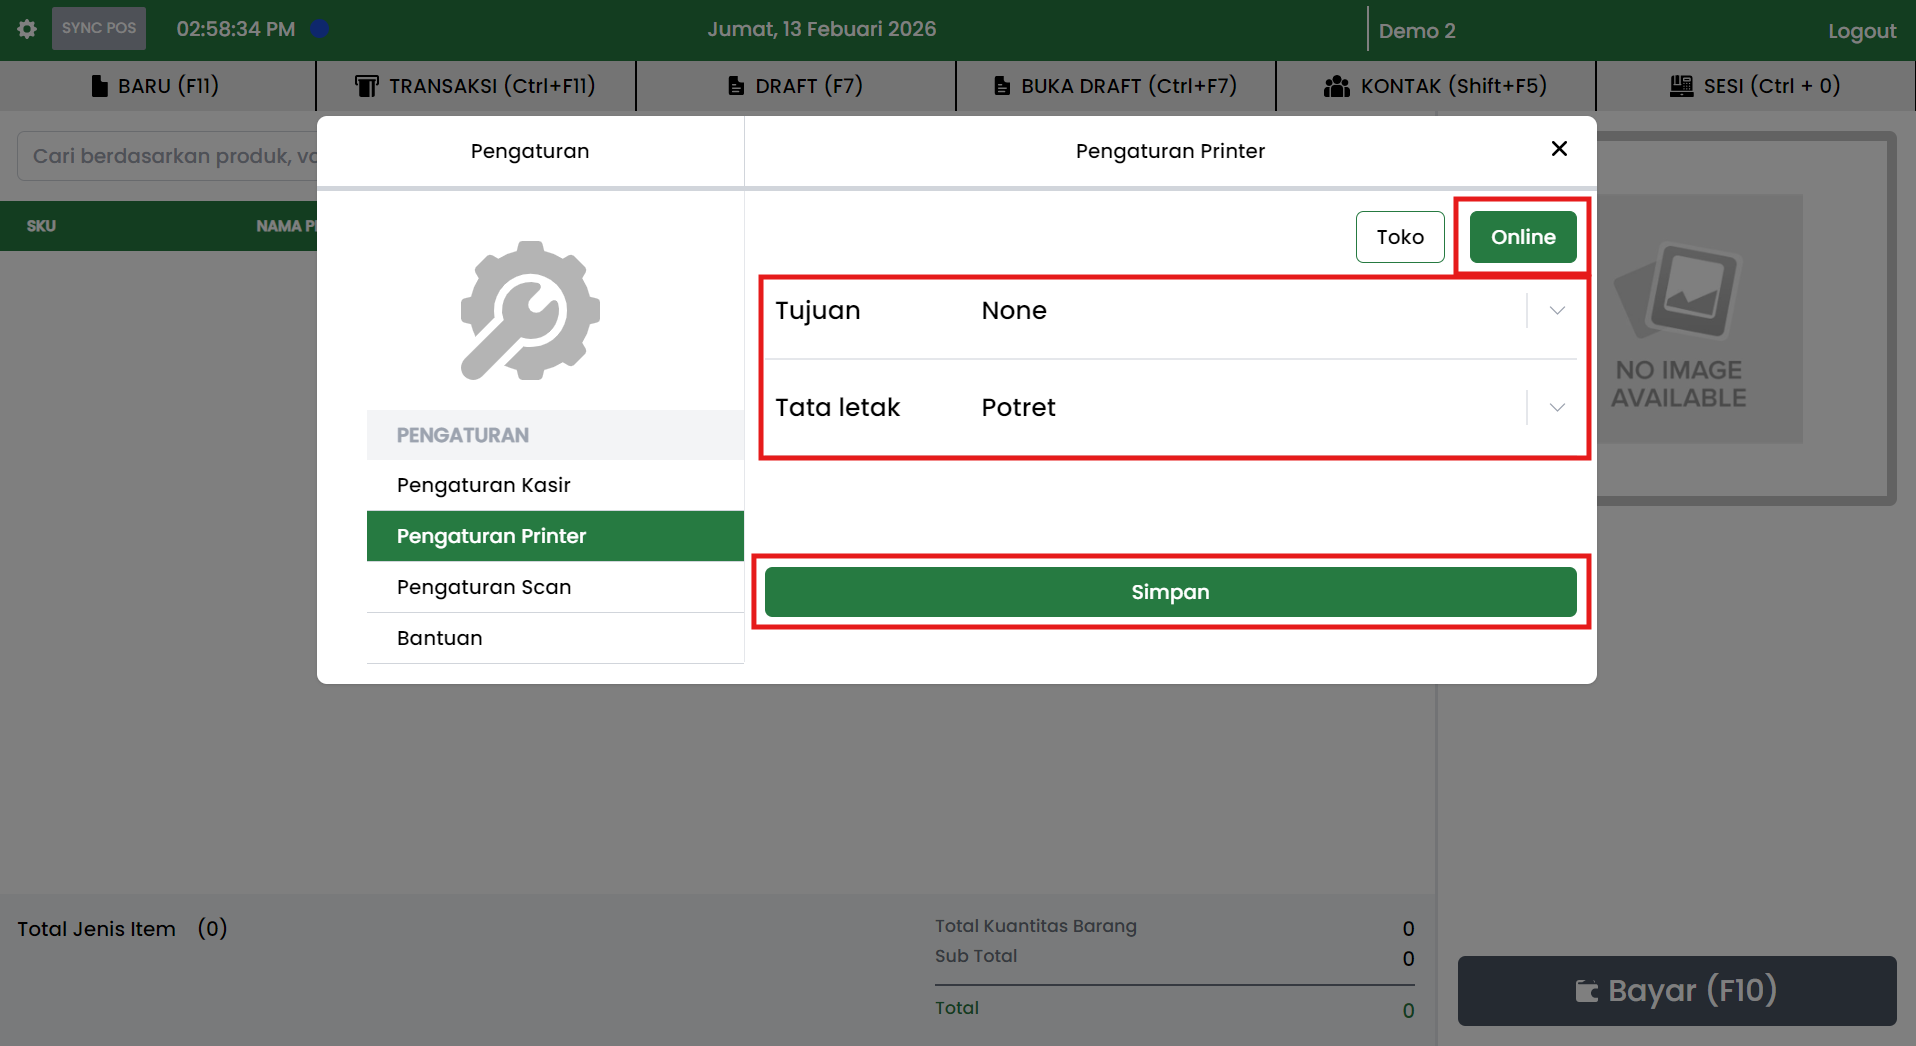
- Open Printer Settings.
- Click the Online tab.
- Select the Destination and Layout according to online invoice needs.
- Click Save.
Scan Settings
This menu configures item input behavior during scanning or product entry.
Options available in the example display:
- Toggle: Use the same product within 1 transaction
Toggle function:
- Active: the system merges identical product items into one row and increases quantity.
- Inactive: the system can separate identical items into different rows (depending on system rules).
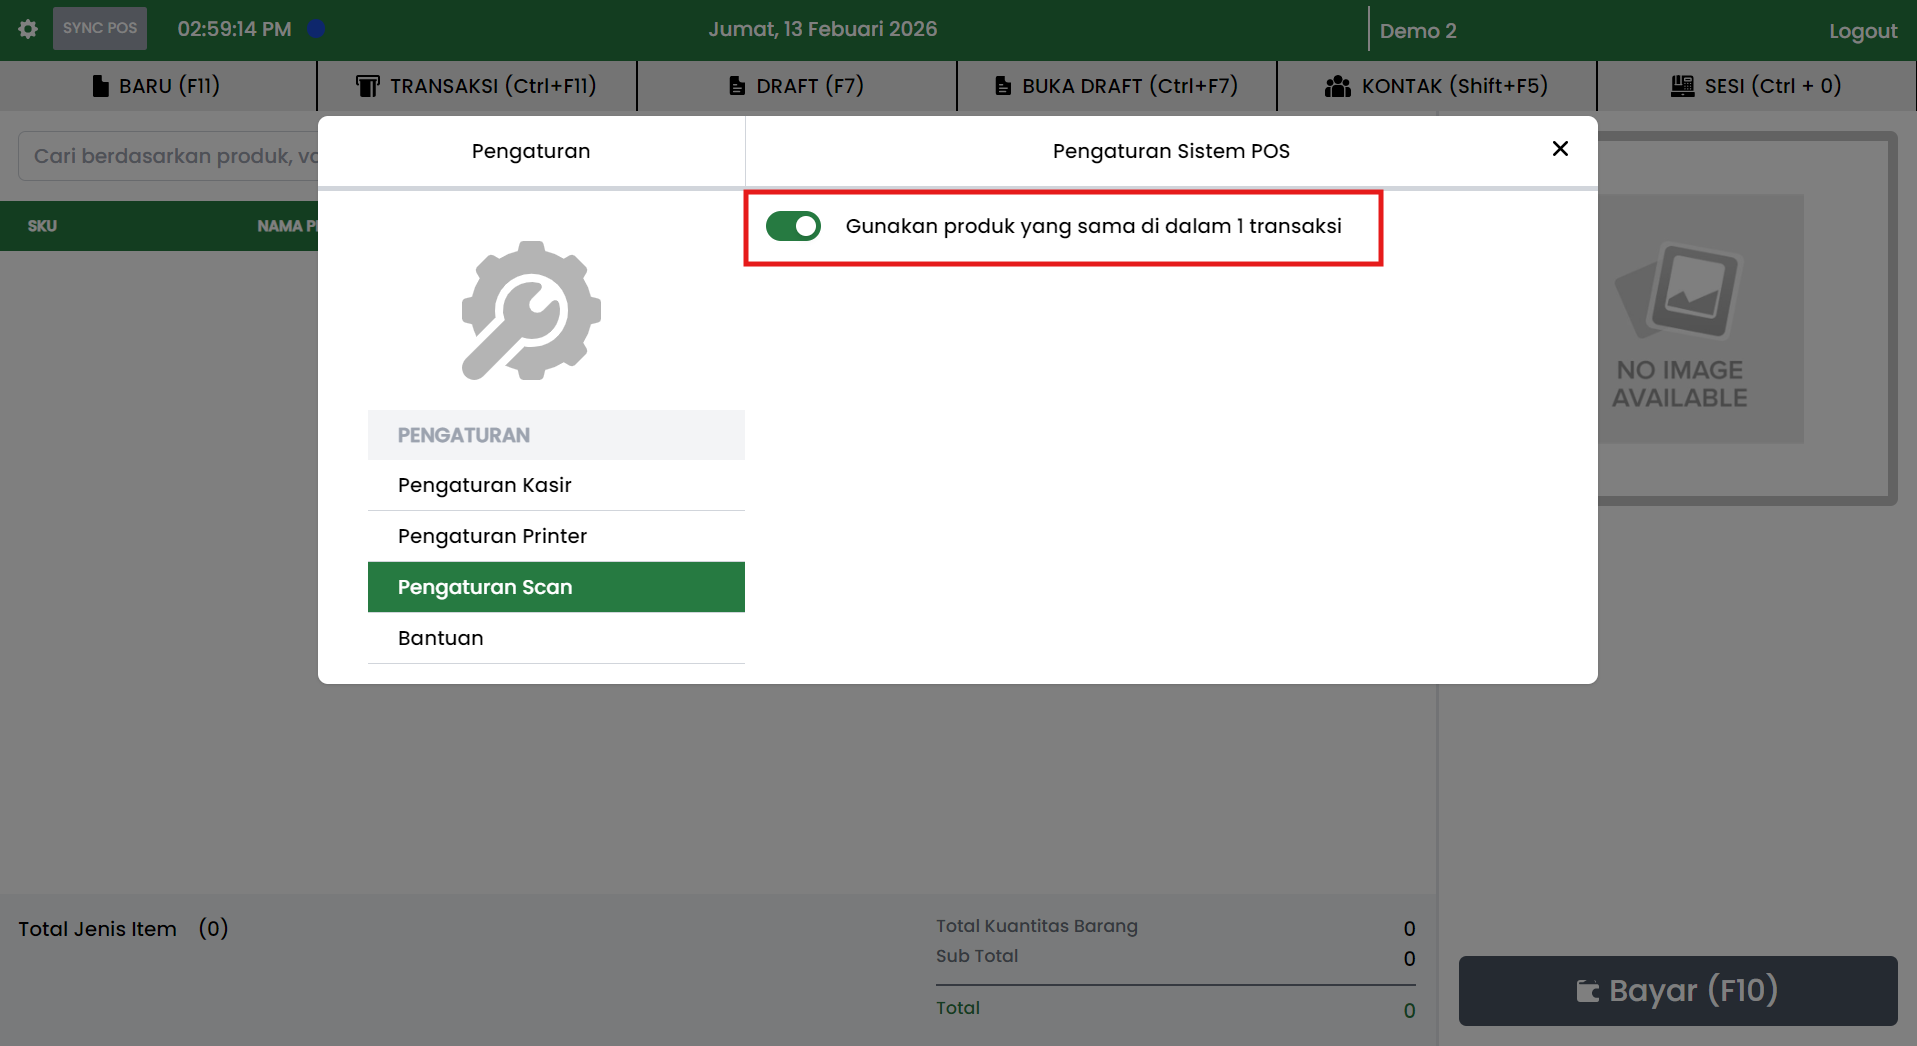
Steps:
- Open Scan Settings.
- Adjust the toggle according to operational needs.
- The system saves changes according to the application mechanism (if there is a save button, click Save).
Help
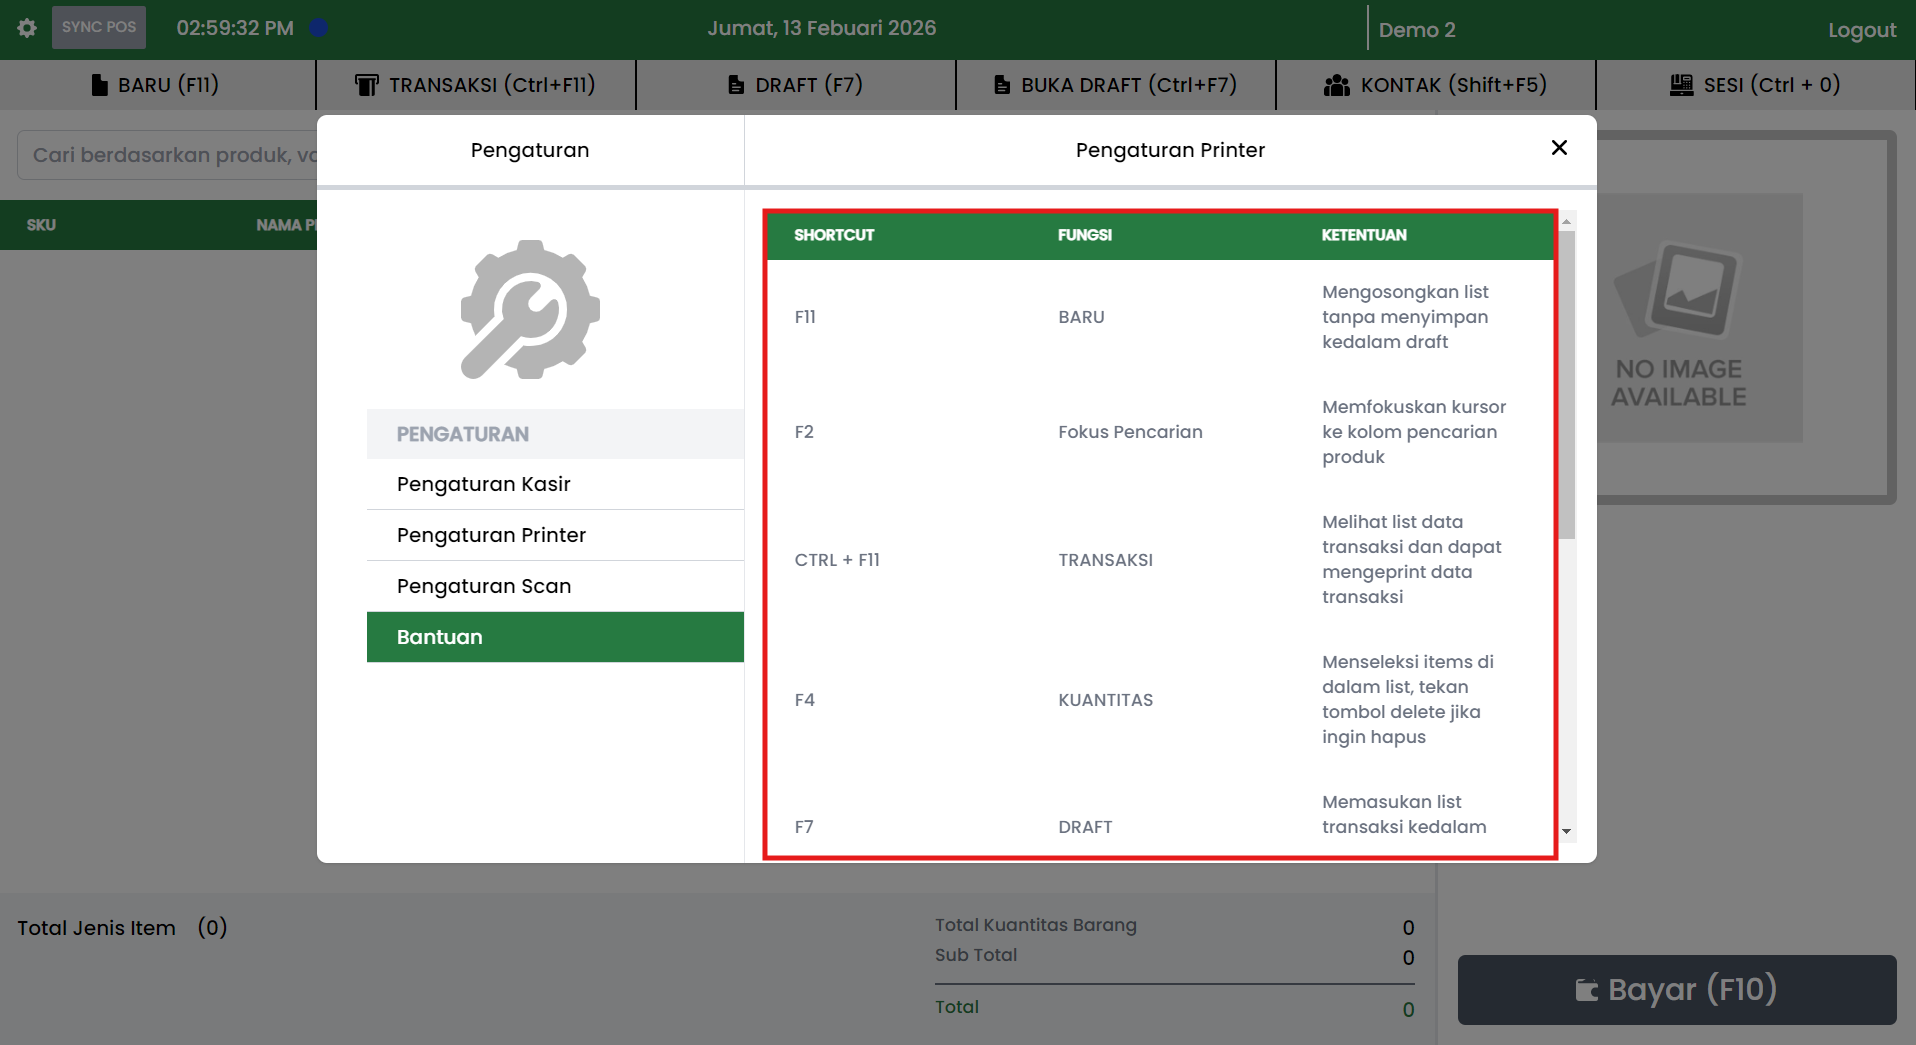
The Help menu contains a brief guide and POS keyboard shortcuts.
The help table generally contains:
- Shortcut
- Function
- Description
Common shortcuts:
- F11: New
- F2: Focus search
- Ctrl + F11: Transactions (history and print)
- F7: Draft
- Other shortcuts according to the system list
Recommended Operational Practices
- Set the Store, Warehouse, and Cash Register before operations begin.
- Test Printer Settings with a small transaction before peak hours.
- Enable consistent scan rules so item input doesn't confuse cashiers.
- Limit Unbind Mac usage to admins or designated PICs.
- Use the Help menu as a quick reference for shortcuts to speed up cashier work.